How to Adjust Auto Clicker Speed in Auto Clicker on Steam
Auto Clicker on Steam is a powerful tool that automates mouse clicks for games, apps, and repetitive tasks.
One of the most common key features is its adjustable auto clicker speed, which lets you customize how fast or slow the tool operates.
Adjusting this speed is essential because it determines how effectively Auto Clicker meets your goals, whether that’s racking up points in a game, speeding through work, or running a smooth automation script.
This guide will cover everything you need to know about tweaking Auto Clicker’s speed on Steam, from basic adjustments to practical tips, so you can tailor it perfectly to your needs.
Understanding Auto Clicker Speed
Auto Click speed refers to how quickly the tool performs automated clicks, measured in milliseconds (ms).
A millisecond is one-thousandth of a second, so a setting of 1000ms equals one click per second, while 10ms translates to 100 clicks per second.
The difference between slow and fast clicking is stark.
Slow speeds (1-2 clicks per second) mimic casual human input, offering precision for tasks requiring deliberate timing, like navigating menus or triggering specific actions.
Fast speeds (20-100 clicks per second), on the other hand, are perfect for maximizing output in scenarios where quantity takes over accuracy.
In idle games on Steam, like Clicker Heroes, a fast setting (15ms) can get you resources quickly, but if it’s too rapid, the game might not register every click, wasting effort.
For productivity tasks, such as filling forms, a moderate speed auto clicker (200ms) keeps things smooth without overloading the software.
In automation scripts, speed impacts stability. Ultra-fast clicks (1ms) might crash an app or trigger anti-cheat detection in games.
So, tuning the auto speed clicker to match the task ensures optimal results, balancing efficiency with reliability.
How to Adjust Auto Clicker Speed on Steam
To adjust the click speed for Auto Clicker on Steam, you must first launch Steam, head to your Library, find Auto Clicker, and click “Launch” to start the app.
Basic Auto Clicker Speed Settings
Once the app starts, look for the Interval Configuration section in the Standard tab.
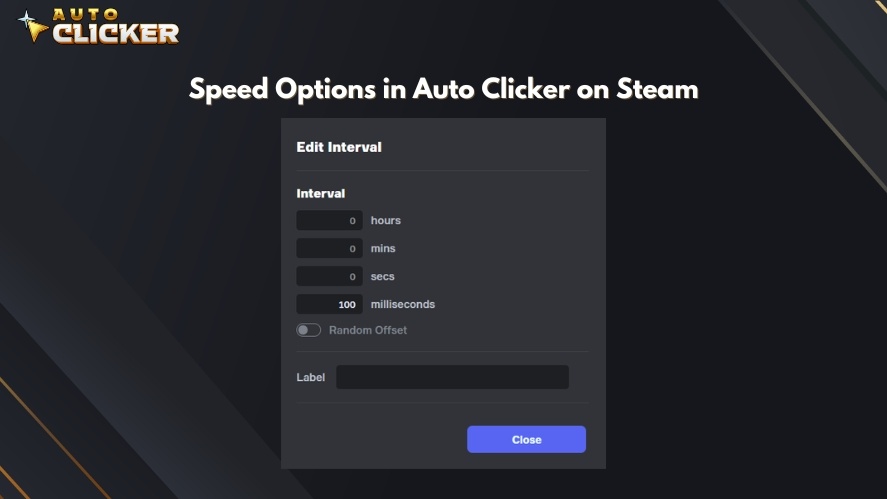
Next, enter your desired speed in the four input boxes labeled as hours, mins, secs, and milliseconds.
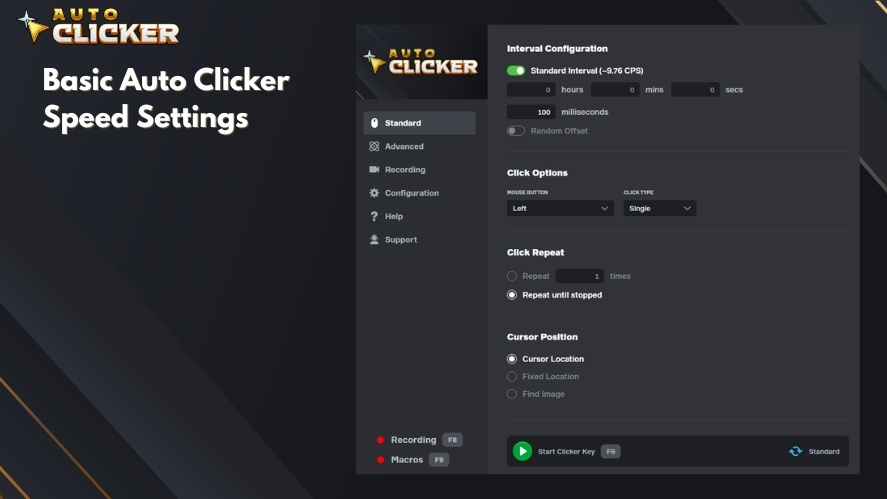
For example, type “100” in the milliseconds box for 10 clicks per second, or “2” in the seconds field for one click every two seconds. Smaller values mean faster clicks.
Next, choose Cursor Location in the Cursor Position section to let the app click at your cursor position.
Finally, hit F6 to start the automatic clicker. If it’s too slow or fast, tweak the number and test again until it feels right.
Advanced Auto Clicker Speed Adjustments
Advanced adjustments let you tailor speed to specific scenarios.
To configure delays between clicks for accuracy, turn on the “Random Offset” toggle in the Interval Configuration section.
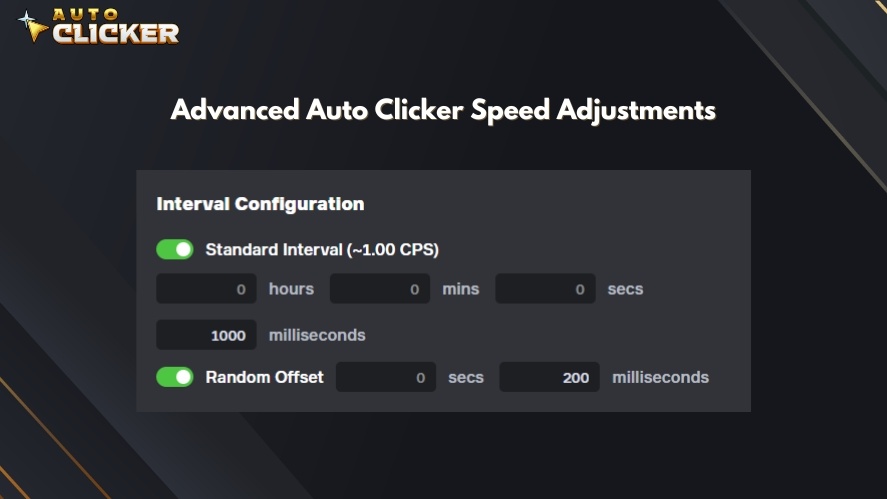
You’ll see two new input boxes appear: secs and milliseconds.
It works by increasing or decreasing the click interval timer based on the entered offset each time the tool clicks.
For example, if you set the Standard Interval to 1000 milliseconds and Random Offset to 200 milliseconds, the tool will click once every 800 milliseconds or 1.2 seconds.
Read More: Clicker Speed Test: How Fast Can You Click?
Best Auto Clicker Speed Settings for Different Uses
Auto Clicker’s flexibility shines when you tailor its speed to specific tasks. Whether you’re gaming on Steam or automating work, the best setting for auto clicker speed can maximize results.
Here’s a breakdown of the best speeds for different uses.
For Gaming
For idle games like Clicker Heroes, set a fast pace of 10ms to 50ms (20-100 clicks per second) to get resources quickly.
In FPS titles needing trigger spamming, 50ms to 100ms (10-20 clicks per second) keeps it manageable and within most game limits.
For resource collection in strategy games, a moderate 200ms (5 clicks per second) ensures steady progress without overwhelming the interface.
In competitive gaming, use 100ms to 250ms click speed to mimic human speed, reducing ban risks from anti-cheat systems. Remember, always check game rules to stay safe when using computer clickers.
For Productivity & Automation
Outside gaming, automatic mouse clicker boosts efficiency in work and automation tasks.
For form filling, a steady 200ms to 500ms (2-5 clicks per second) matches typical human pacing, avoiding errors in web forms or apps. Software testing benefits from 100ms to 300ms to simulate user interactions reliably without crashing the program.
For broader automation, like running macros, a variable range of 50ms to 1000ms suits different steps, depending on the task’s complexity and timing needs.
Push for efficiency with faster speeds, but watch your CPU usage in Task Manager. If it spikes or the app lags, dial back to 100ms or higher.
Adding small random delays (Random Offset) keeps things smooth and prevents system overload. Aim for a pace that gets the job done without bogging down your machine.
These settings are starting points, so, tweak them based on your setup and goals. With the right speed, Auto Clicker becomes a powerful tool for both play and productivity on Steam.
GIF: Auto Clicker speed differences in a game vs. a productivity tool.
Troubleshooting Auto Clicker Speed Issues
Sometimes Auto Clicker’s speed doesn’t behave as expected, but most issues have simple auto clicker fixes.
Here’s how to troubleshoot common problems and get your clicks back on track.
Auto Clicker Clicking Too Fast or Too Slow?
If the tool’s clicking faster or slower than you want, the click interval is likely off.
Head to the Standard tab and double-check the value in the Click Interval section.
For slower clicks, increase the milliseconds; for faster, decrease it. Test after each tweak to get the pace you’re after.
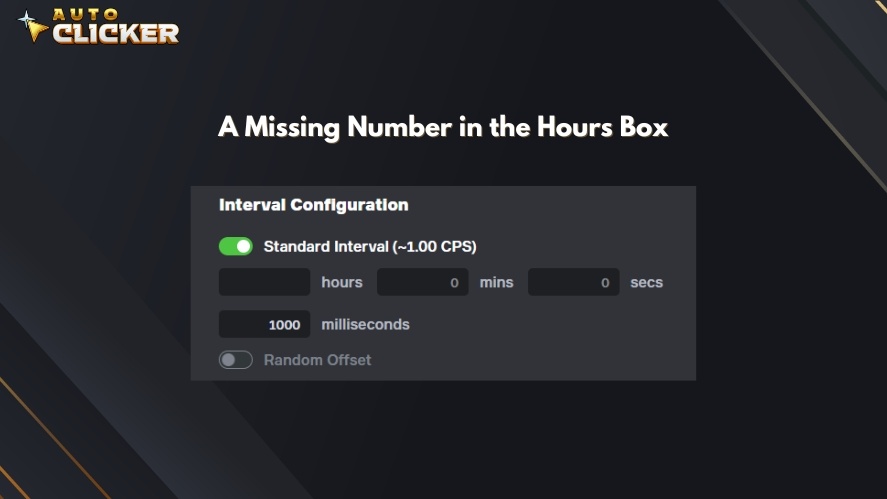
Alternatively, check if there’s a zero in each field by default. If you accidentally remove one, the tool likely won’t function properly.
Laggy or Unresponsive Clicks?
If clicks stutter, lag, or don’t register, your system might be strained.
Open Task Manager (Ctrl+Shift+Esc) and look at CPU usage. Auto Clicker at ultra-fast speeds (1ms) can spike it, especially with other apps running.
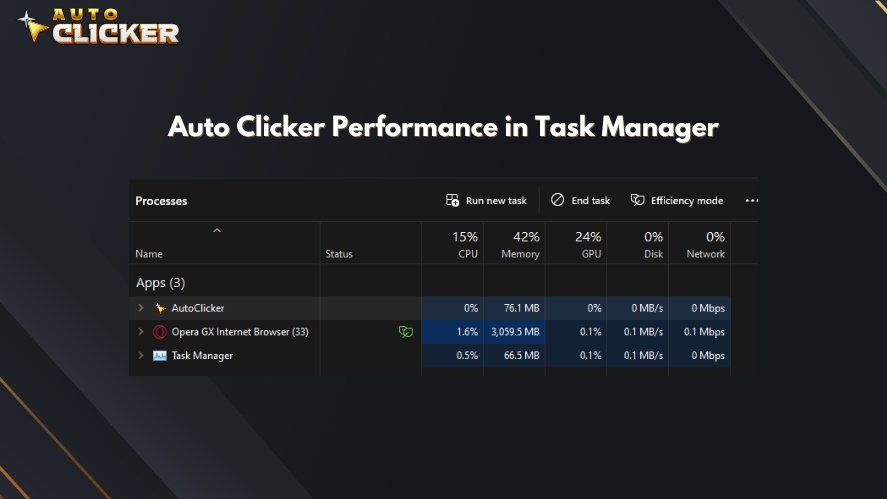
Slow the interval to 100ms or higher to ease the load. Also, close unnecessary background programs like browsers or Discord to free resources.
If lag persists, lower your click speed further until it’s smooth.
Speed Settings Not Applying?
When your chosen speed isn’t sticking or clicks stay at a default rate, the app might’ve glitched.
First, save your settings and close Auto Clicker completely. Relaunch it from your Steam Library and test again.

If that fails, exit Steam entirely (right-click the tray icon and select “Exit”), then restart it and open Auto Clicker fresh.
This resets any hiccups in the app or its connection to Steam, ensuring your settings take effect.
Conclusion
Adjusting Auto Clicker speed on Steam is a game-changer, whether you’re optimizing for gaming, productivity, or automation.
The beauty of smart Auto Clicker lies in its flexibility, so don’t be afraid to experiment! Try different click speeds adn play around until you hit the perfect rhythm.
For more help, check out the Steam Community Hub for discussions, or visit our website for contact info. Thanks for diving in, and happy clicking!

How to Submit Feature Requests for Auto Clicker

Keyboard Auto Clicker: How to Set Up and Optimize for Gaming