How to Use Color Detection in Auto Clicker on Steam
Color detection is one of the smartest automation features available in modern auto clickers. It allows your computer to “watch” specific pixels on the screen and respond instantly when a certain color appears perfect for timing-sensitive tasks. From spotting visual cues in idle games to triggering actions in productivity workflows, color detection turns your auto clicker into a reactive, time-saving tool.
One of the best examples of where this comes in handy is the popular idle game Cookie Clicker. In this game, Golden Cookies randomly appear and disappear quickly offering powerful bonuses to those who click them in time. But constantly watching the screen can be exhausting, especially during long sessions.
That’s where color detection becomes a game-changer. With the Auto Clicker available on Steam, you can automate your clicks the moment that golden shimmer appears no more missed chances or wasted clicks.
In this tutorial, you’ll learn how to set up and use color detection step by step. Whether you’re new to auto clickers or looking to optimize your idle game grind, this guide has you covered.
Let’s dive in.
What Is Color Detection in Auto Clicker?
Color detection is a feature that allows an Auto Clicker to watch a certain pixel or area on your screen. When a specific color appears in that location, the tool automatically clicks or triggers an action.
This is super helpful for situations like:
- Reacting to buttons or alerts that change color
- Detecting visual cues in idle or productivity apps
- Clicking rare or timed items in games like a Golden Cookie when it appears in Cookie Clicker Game
Here’s how it works:
- You choose the screen location.
- You define the color (using RGB or hex).
- The auto clicker checks that pixel often (even hundreds of times per second).
- When the color matches, it performs the click or action.
It’s like giving your computer eyes and reflexes. No more waiting. No more missing the moment.
In comparison, image detection looks for patterns or entire images. That’s great for complex UI recognition. But color detection is quicker and perfect for simple but time-sensitive tasks.
Why Use Color Detection Instead of Image Detection?
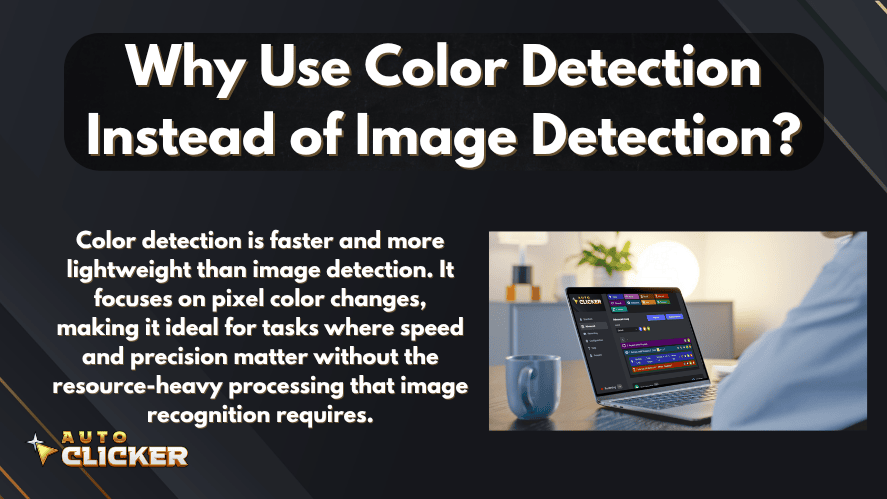
While image detection is ideal when you want to track full visuals or complex icons, color detection is faster and easier to use. If your goal is to detect a color and click as fast as possible, this feature is your best choice.
For example:
- A smart autoclicker can detect only the golden hue of a power-up.
- A clicking tool can trigger a click when a progress bar turns green.
- A color-based trigger avoids needing full image matches, making it more efficient.
Color detection also uses fewer system resources. So, if you want something lightweight and responsive, it’s the smarter way to automate.
How to Use Color Detection in Auto Clicker on Steam
Here’s a complete walkthrough for setting up color detection using the Auto Clicker you can find on Steam. We’ll use the example of catching the Golden Cookie in Cookie Clicker.
Step 1: Open Auto Clicker on Steam
First, launch the Auto Clicker you’ve installed from Steam. If you haven’t already, look for a version that offers features like:

- Color detection
- Click detection
- Image auto clicker support
- A customizable interface
This tool is one of the best auto clickers for PC because of its flexibility and power.
Step 2: Go to the Color Detection Settings
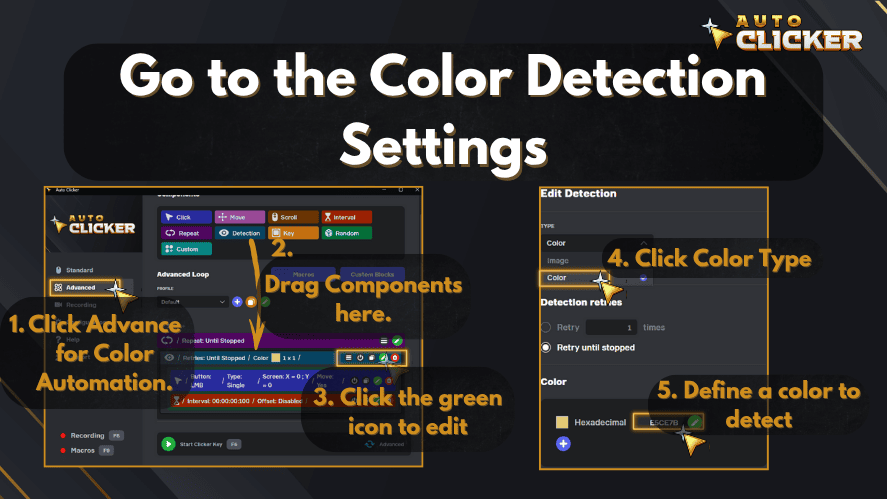
Next, find the tab or menu labeled Advanced Automation or Color Detection.
Here, you’ll see options to:
- Choose a screen location
- Define a color to detect
- Set the trigger action
You’ll want to keep the Auto Clicker running in the background as you test your setup.
Step 3: Select the Screen Area
Click the “select area” option.
- Position your mouse pointer over the game or application window.
- Use the crosshair or built-in picker to hover over the area where your color will appear.
- Click to confirm.
Pro tip: In Cookie Clicker, wait for a Golden Cookie to appear and then pause the game. That way, you can pick the exact spot and color.
You can also take a screenshot and use a tool to zoom in and find the exact pixel.
Step 4: Define the Target Color
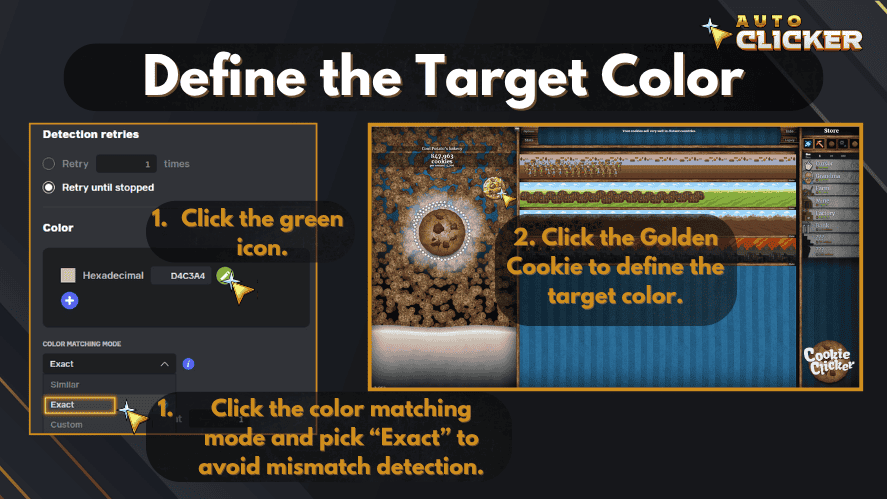
After selecting the area, it’s time to set the color.
You have two main options:
- Use a built-in color picker from the Auto Clicker
- Manually enter the RGB or hex color value
Use a third-party color picking tool if needed. It gives you more accuracy, especially if the pixel color changes slightly each time.
Make sure to also define the tolerance range. This controls how strict the match should be:
- Low tolerance = exact color match only
- Higher tolerance = more flexible match for similar shades
This helps avoid false triggers while still being responsive.
Step 5: Set What Happens When the Color Is Detected
This is where the fun begins.
Tell the Auto Clicker what to do when the target color appears:
- Single click
- Double click
- Click and hold
- Repeat clicks at intervals
Most tools also let you:
- Add a delay before or after the action
- Limit how often the action repeats
- Stop after a number of clicks
This turns your setup into a smart autoclicker that reacts instantly and accurately.
A perfect example of this in action is using color detection in Cookie Clicker to catch the Golden Cookie. The Golden Cookie randomly appears on the screen and has a shiny golden-yellow glow that stands out. You can set up your Auto Clicker to watch that specific pixel color.
Once it detects that golden hue, it instantly clicks the cookie for you. Just use a color picker to grab the color from a screenshot, input the RGB or hex value, and set the action to “click.” This ensures you collect every Golden Cookie, even when you’re away from the screen. It’s one of the smartest ways to use color-based automation in idle games.
Step 6: Test and Refine Your Setup
Before you let the automation run full-time, test it.
- Start the game or app.
- Wait for the trigger color to appear.
- Watch if the auto clicker reacts correctly.
Things to check:
- Is the click landing in the right spot?
- Is it clicking too often or too little?
- Is it clicking when the color hasn’t changed?
If needed, adjust:
- The tolerance range
- The pixel coordinates
- Delay settings
It may take a few tries to get it perfect, but once it’s dialed in, it runs like magic.
Pro Tips to Improve Color Detection Accuracy
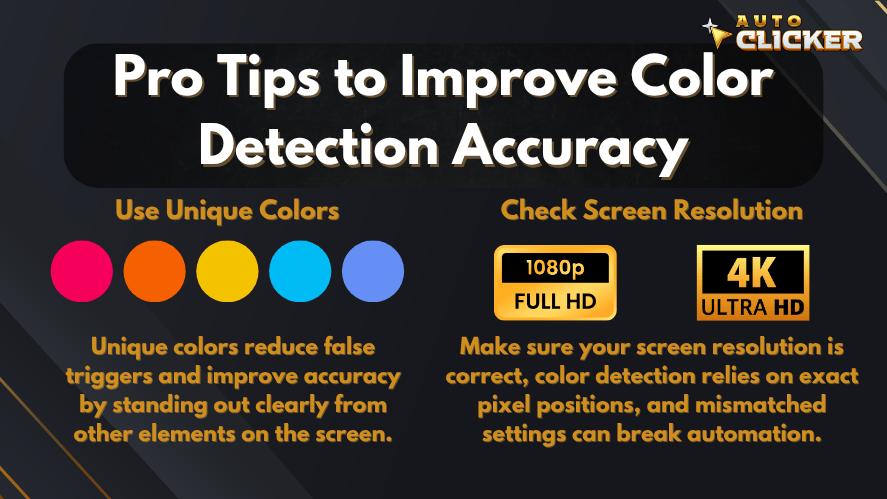
Want better performance and fewer mistakes? Follow these pro tips.
Use Unique Colors
Choose target colors that don’t appear often on the screen. This reduces the risk of false positives.
For example, a bright yellow Golden Cookie is easy to track because few other parts of the game use that color.
Check Screen Resolution
Your screen resolution affects pixel location. If you change monitor settings or scale Windows display settings, the detection might break.
Make sure you:
- Keep the game window in the same position
- Don’t change resolution after setting up
- Re-calibrate if you switch displays
This matters most when you’re working with multiple screens or high-resolution displays like 4K.
Combine Features for Best Results
Mix color detection with:
- Click detection
- Image detection
- Macro loops
This creates a powerful automatic clicker system that handles all tasks with minimal input.
For example:
- Color detection triggers the first action
- Then a timer waits and checks image status
- Then a macro completes the follow-up sequence
Now you’ve got a true automated click setup that adapts to what’s on-screen.
Other Ways to Use Color Detection
Beyond Cookie Clicker, there are tons of ways to use color detection effectively.
Idle Games

Idle games often flash power-ups or limited-time offers. Use color detection to:
- Collect them instantly
- Farm resources faster
- Automate upgrade purchases
Games like AdVenture Capitalist, Clicker Heroes, or Realm Grinder benefit a lot from this.
Workflow Automation
You can also use this feature in apps where a button lights up when ready.
Examples:
- Auto-click “Start” when software updates are ready
- Click “OK” when a download completes
- Watch for red or green alerts
These tasks can now run while you focus on other things.
Notification Triggers
Let the Auto Clicker click or alert you when:
- A status icon turns red
- A chat message appears
- An app shows a popup
Combined with auto mouse click routines, this creates a hands-free workstation.
Frequently Asked Questions
Search for “Auto Clicker” in the Steam store. Pick a tool with positive reviews and features like color detection and image detection.
Most games work, but full-screen or anti-cheat games may block overlays. Windowed mode is often more reliable.
Yes. Color detection tracks a single pixel’s color. Image detection scans a section of the screen for a pattern.
Use tools like ColorPic or built-in pickers in the clicker. Screenshots also help. Zoom in to match the exact RGB or hex code.
Conclusion: Start Automating Smarter with Color Detection
Color detection turns your Auto Clicker into a smart automation tool. You’re no longer clicking blindly or reacting late. Now your system clicks instantly when it sees the right visual cue.
With just a bit of setup, you can:
- Catch special items
- Trigger actions
- Automate workflows
- Save your fingers
If you’re serious about automating your games or desktop tasks, this feature is a must-have. Combine it with click detection, image auto clicker functions, or even build your own macros for the ultimate auto click on PC experience.
Ready to build your own smart clicking system?
Try color detection in your Auto Clicker today and automate like a pro.

Top-Rated Auto Clicker Apps in 2026

What is an Auto Clicker and Why You Might Need One