Click Position Setup Guide for Auto Clicker Steam
Have you ever tried using an auto clicker but noticed your clicks were slightly off? That usually comes down to one thing: click position. When your clicks are not landing exactly where they should, even the best setup can fail.
In simple terms, click position is the exact spot on your screen where an auto clicker performs a click. This might sound basic at first. However, it plays a huge role in how well your automation works, especially when using tools on Steam.
So, whether you are using auto clickers for gaming or for work, learning how to control click position can save you time and frustration.
What Is Click Position in Automation Tools
To begin with, click position refers to the X and Y coordinates on your screen where a click happens. Every point on your screen has a coordinate. When you set a click position for auto clicker tools, you are telling the software exactly where to click.
Now, there are two main ways this works.
Fixed Position vs Current Cursor Location
First, there is fixed position. In this mode, the click always happens in the same place. For example, if you are farming resources in a game, this is very useful. The button stays in the same spot, so your auto clicker position does not need to change.
On the other hand, there is current cursor location. Here, the click happens wherever your mouse is. This is more flexible. However, it is less precise if your cursor moves around.
Because of this, choosing the right mode is important when setting your click position settings for windows.
Why Click Position Matters
At first glance, you might think any click will do. But that is not the case.
A small shift in position can lead to missed clicks. Over time, this causes errors. For example, in a game, you might stop progressing. In a task, you might click the wrong button.
That is why a good click position helps with:
- Better accuracy
- Faster task completion
- Fewer mistakes
Common Use Cases
Click position is used in many ways.
In gaming:
- Idle clicker games
- Farming and grinding
- Repeating actions
In productivity:
So, whether you use a mouse clicker for fun or work, this setting matters more than you might expect.
Why Click Position Matters in Auto Clicker on Steam
Now that we understand the basics, let’s look at why click position is especially important when using Auto Clicker on Steam.
Precision Control for Repetitive Actions
When you repeat the same action many times, precision becomes key. With proper mouse automation, every click lands exactly where it should.
As a result, your workflow becomes smoother.
Reduces Manual Errors
Manual clicking often leads to small mistakes. Over time, these add up. However, an automatic clicker removes that problem.
Once you set the click position correctly, the tool handles everything for you. This improves automated clicking accuracy right away.
Enhances Automation Workflows
In addition, a well-set click position helps automate mouse clicks more effectively. This is useful in both games and work tasks.
For example, if you are clicking the same button hundreds of times, a stable setup saves effort and time.
Improves Gaming Performance
In many Steam games, speed matters. If you are using the fastest auto clicker settings but your click position is off, you lose efficiency.
So, both speed and position must work together.
Easier Than Other Tools
Compared to other good auto clickers, Steam tools are often simpler to use. The layout is clean, and the options are easy to understand.
That is one reason why many users consider it among the best auto clicker software options today.
How to Set Click Position in Auto Clicker on Steam
Next, let’s go step by step. If you are wondering how to set up auto clicker tools correctly, this section will guide you.
Step 1: Launch Auto Clicker on Steam
First, open Steam and go to your library. Then, launch your auto clicker.
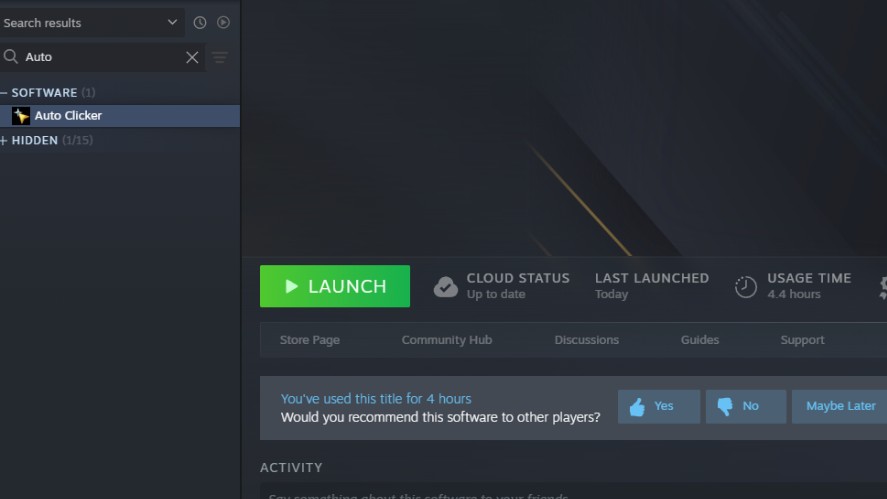
Once it opens, you will see the main interface. Most tools show basic settings right away, such as click type and interval.
At this stage, take a moment to look around. Knowing where things are will make the next steps easier.
Step 2: Choose Click Mode
After that, you need to choose how your clicks will behave.
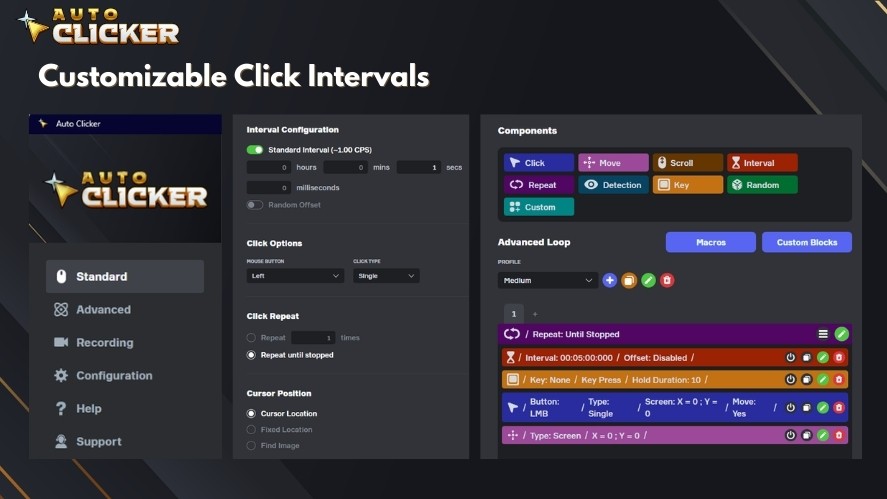
You will usually see two options:
- Fixed position
- Current cursor location
If your task is repetitive and does not move, go with fixed position. If your task changes, then cursor mode works better.
This choice directly affects your automated mouse click setup.
Step 3: Assign Click Coordinates
Now comes the most important part. You need to define your click position.
There are two common ways to do this.
First, you can enter the X and Y coordinates manually. This works well if you already know the exact position.
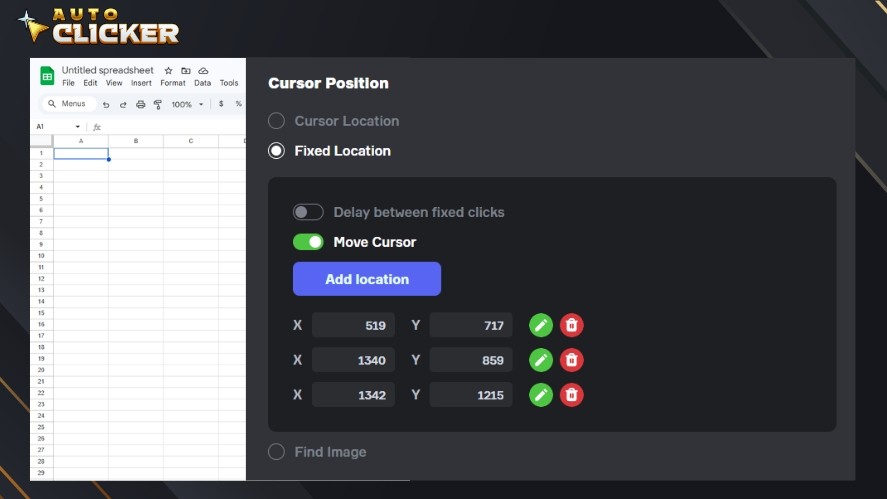
Second, many tools offer a pick location feature. With this, you simply click on the screen, and the tool records the position.
To get better results, follow these tips:
- Keep your screen resolution the same
- Make sure the button or target does not move
- Double check before starting
This step is key for accurate auto clicker position setup.
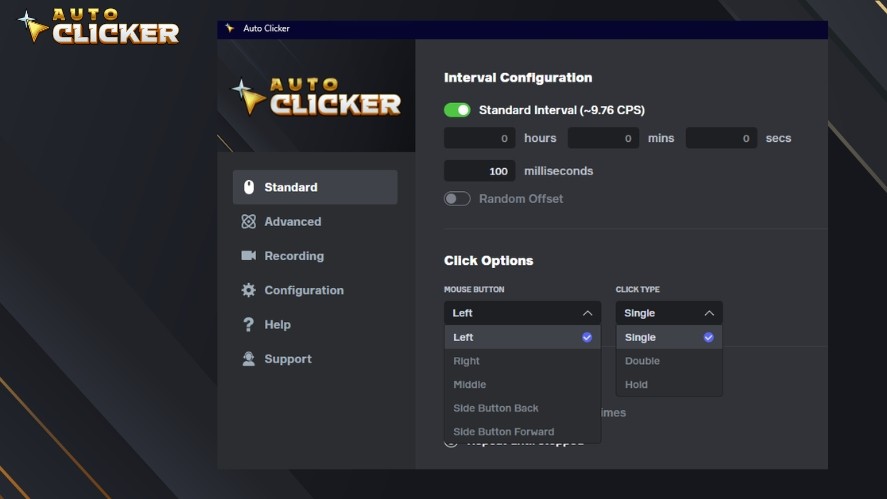
Step 4: Configure Click Settings
Once your position is set, you can adjust the rest of your auto click setting.
Here are the main options:
- Click interval, which controls speed
- Click type, such as single or double
- Repeat settings, which control how long it runs
If needed, you can also set timeout on click. This helps limit how long the automation runs.
At this point, you can experiment with different speeds to find the best setup.
Auto Clicker Settings Quick Reference
You might notice there are several settings to adjust when setting up your auto clicker. At first, this can feel a bit confusing. However, once you understand what each option does, things become much easier. To help you get started faster, the table below gives a simple overview of the most important settings and how to use them effectively.
| Setting | Description | Recommended Use |
|---|---|---|
| Click Position | Defines where the click happens on screen | Use fixed for static targets |
| Click Interval | Time between clicks | Lower for speed, higher for stability |
| Click Type | Single, double, or multiple clicks | Match task requirement |
| Repeat Mode | Number of times or infinite loop | Use infinite for idle tasks |
| Set Timeout on Click | Stops clicking after a set time | Useful for controlled automation |
| Cursor Mode | Uses current mouse location | Best for flexible tasks |
| Fixed Position Mode | Uses saved coordinates | Best for repetitive actions |
| Advance Mode | Multi-step or multi-position clicking | Use for complex workflows |
Start and Test Your Setup
Now that everything is in place, it is time to test your setup.
Start the auto clicker and watch how it performs. At first, run it slowly. This helps you see if the click position is correct.
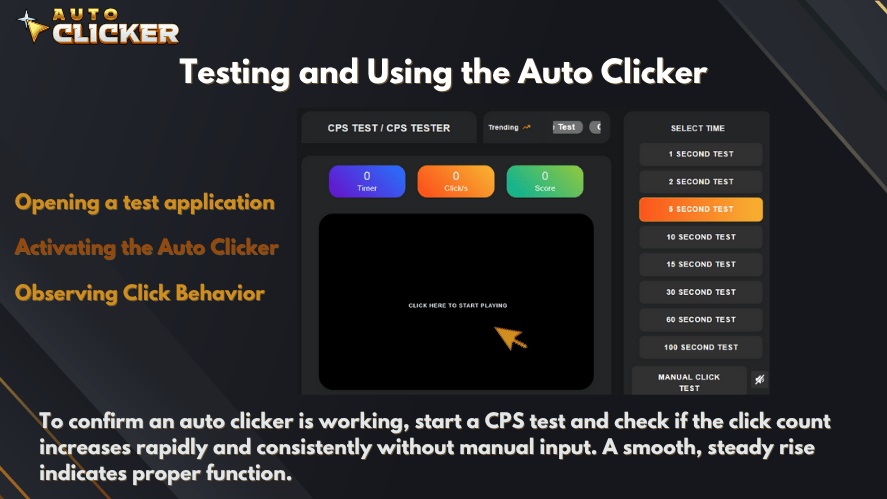
If the clicks are slightly off, do not worry. Just go back and adjust the coordinates. Small changes can make a big difference.
Also, check if the timing feels right. If it is too fast or too slow, update your settings. This is where you learn how fast to set auto clicker tools for your specific task.
Testing may take a few tries. However, once it works, your setup will run smoothly.
Best Practices for Optimizing Click Position
Even after setup, there are ways to improve your results. A few small habits can help you avoid problems later.
First, always use the same screen resolution. If your resolution changes, your click position settings for windows may shift.
Next, avoid moving elements on your screen. If a button changes location, your clicks will miss.
In addition, use hotkeys when possible. This allows you to start or stop your auto clicker quickly.
It is also a good idea to test in a safe environment. For example, try it in a non-critical task before using it in a game or work setting.
Finally, save your settings. Many of the best auto clickers allow profiles. This means you can switch between tasks without starting over.
Common Issues When Setting Click Position
Even with a good setup, problems can happen. The good news is that most issues are easy to fix.
Clicks Not Registering Correctly
Sometimes, clicks do not land where you expect.
This usually happens because:
- The coordinates are slightly wrong
- The screen scaling is off
To fix this, recheck your click position. Then, test again at a slower speed.
Also, make sure your mouse click setting matches your task.
Screen Resolution Problems
Another common issue is resolution changes.
If your screen size or scaling changes, your auto clicker position will no longer match the target.
To avoid this, keep your display settings the same. If you must change them, reset your coordinates after.
Interference from Other Applications
Background apps can also cause issues. For example, overlays or pop-ups may block your clicks.
Because of this, close apps you do not need. This helps your automatic clicker run better.
In some cases, running your tool with higher priority can also help.
Advanced Use Cases for Click Position
Once you understand the basics, you can do more with your setup.
Gaming Automation
Many players use auto clickers for grinding. This includes farming items or repeating actions.
With the right click position, you can let the tool run while you focus on other things.
Also, adjusting the fastest auto clicker settings can improve results in idle games.
Productivity Automation
Click position is not just for games. It is also useful for work.
For example:
- Repeating form entries
- Clicking through software menus
- Testing user interfaces
In these cases, automate mouse clicks to save time and effort.
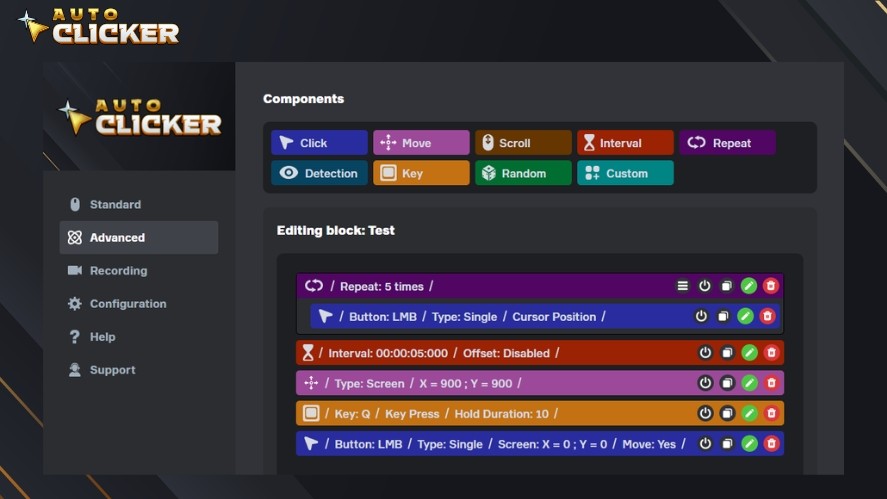
Multi-Position Clicking
Some tools support more advanced features. In advance mode, you can set multiple click points.
This allows you to create a sequence of actions instead of a single click.
For example, you can:
- Click one button
- Wait
- Click another
This is useful for more complex workflows.
Why Choose Auto Clicker on Steam for Click Position Control
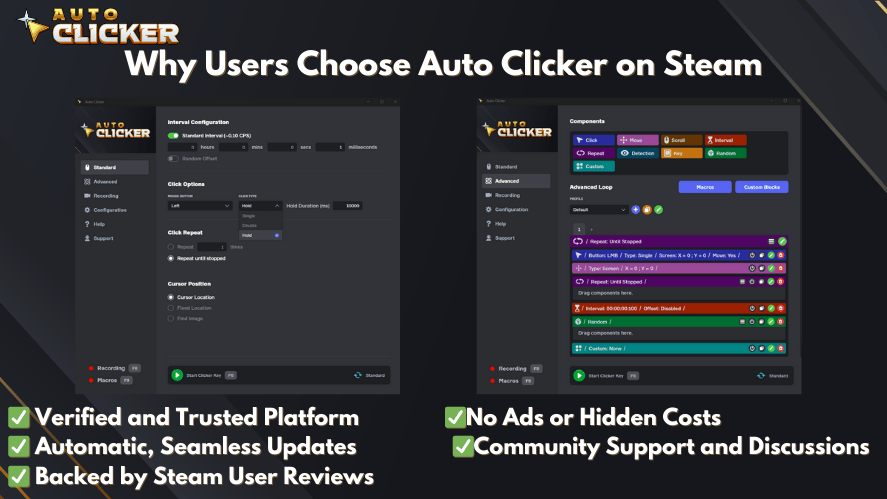
There are many tools available online. You might search for auto clicker download or even wonder how to download an auto clicker safely.
However, Auto Clicker on Steam stands out for a few reasons.
First, it is easy to use. The interface is simple, which makes setup fast.
Second, it offers precise control. You can adjust every detail of your click position for auto clicker tasks.
Third, it is reliable. It works well during long sessions, which is important for both gaming and work.
In addition, it integrates well with Steam. This makes it a good choice for gamers.
When compared to other good auto clickers, it offers a strong balance of features and ease of use.
Frequently Asked Questions
Click position is the exact spot on your screen where the auto clicker performs a click. It is usually set using X and Y coordinates for accuracy.
Start by using the pick location tool or manually entering coordinates. Then test and adjust until the clicks land perfectly on the target.
Many users prefer tools available on Steam because they are easy to use and reliable. The best auto clicker software depends on your needs, but simple interfaces and precise control are key.
It depends on your task. For games, faster speeds may help. For work tasks, a slower and stable setup is better. Always test to find the right balance.
Yes, some tools support advance mode. This allows you to automate mouse clicks across several positions in sequence.
Conclusion
Click position is one of the most important parts of any automation setup. Without it, even the best tools can fail.
By learning how to set and adjust your click position, you gain better control over your tasks. This leads to fewer errors and better results.
Auto Clicker on Steam makes this process simple. From basic setup to advanced features, it gives you the tools you need to succeed.
As you continue using it, try different settings. Test new ideas. Over time, you will find what works best for you.

How to Write a Bug Report for Auto Clicker (Step-by-Step Guide)

How to Submit Feature Requests for Auto Clicker