Auto Clicker Profiles: Set Up Custom Configurations for Any Task
If you often perform repetitive clicking tasks, setting up auto clicker profiles can save time and effort. Instead of adjusting settings every time you use an automatic clicker, you can create multiple profiles for different tasks. This makes automation faster, more efficient, and easier to manage.
Auto clicker profiles are especially useful for gaming, work automation, and software testing. Gamers can use them for rapid clicking in FPS or MMO games, while office workers can automate repetitive tasks like data entry. Developers and testers can also benefit from automated UI interactions.
In this guide, we’ll explore what auto clicker profiles are, why they’re useful, and how to set them up. We’ll also go over best practices to help you manage profiles effectively.
What Are Auto Clicker Profiles?

Definition and Purpose
An auto clicker profile is a saved configuration that controls how an automatic clicker operates. Instead of manually setting the click speed, duration, or target area every time, users can save different profiles and switch between them as needed.
Key Benefits of Auto Clicker Profiles
Using profiles makes an automatic clicker more efficient and flexible. Here are some key advantages:
- Saves time – No need to reconfigure settings each time.
- Customizable – Each profile is tailored for specific tasks.
- Easy switching – Users can switch between different profiles with a single click or hotkey.
Using a safe autoclicker with properly configured profiles also reduces the risk of errors, crashes, or unintended clicks.
Why You Should Configure Auto Clicker Profiles for Different Applications
Auto clickers are used for many different tasks. Setting up multiple autoclicker profiles allows users to optimize automation for specific needs.
1. Gaming Optimization
Many gamers use automatic clickers to automate in-game actions. Instead of clicking manually, they can let the software do the work.
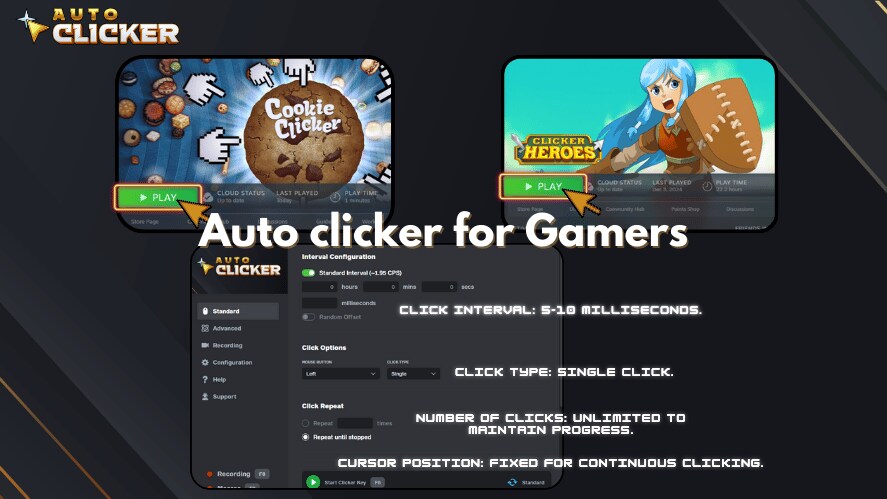
Here’s how auto clicker profiles improve gaming performance:
- Idle & Incremental Games – Automate resource collection and in-game farming.
- FPS & Action Games – Set up auto key clicker profiles for rapid-fire actions.
- MMORPGs – Automate repetitive tasks like inventory management or crafting.
For instance, players can use a space bar auto clicker for games that require constant jumping or pressing the spacebar repeatedly. Similarly, an automatic spacebar clicker can help with time-sensitive game mechanics.
2. Productivity and Work Automation
Auto clickers aren’t just for gaming they’re also valuable for work automation. Office workers and professionals use auto clicker for Mac or Windows to:
- Automate repetitive clicks in spreadsheets or web forms.
- Streamline copy-pasting and file processing tasks.
- Speed up workflow navigation in business applications.
For example, employees who frequently enter data into spreadsheets can set up an automatic key clicker to automate their workflow. This not only reduces manual effort but also improves accuracy.
3. Software Testing and Development
Developers and QA testers use autoclick PC tools for automation testing. With well-configured auto clicker profiles, they can:
- Automate UI interactions for software testing.
- Simulate different user behaviors without manual input.
- Execute repetitive test cases quickly and efficiently.
A properly configured auto key clicker helps developers run tests with minimal effort, ensuring their software functions correctly.
How to Set Up Auto Clicker Profiles
Setting up auto clicker profiles is simple and can be done in a few steps. If you are using Auto Clicker on Steam, follow this guide to create and customize your profiles.
Step 1: Install and Open Auto Clicker on Steam
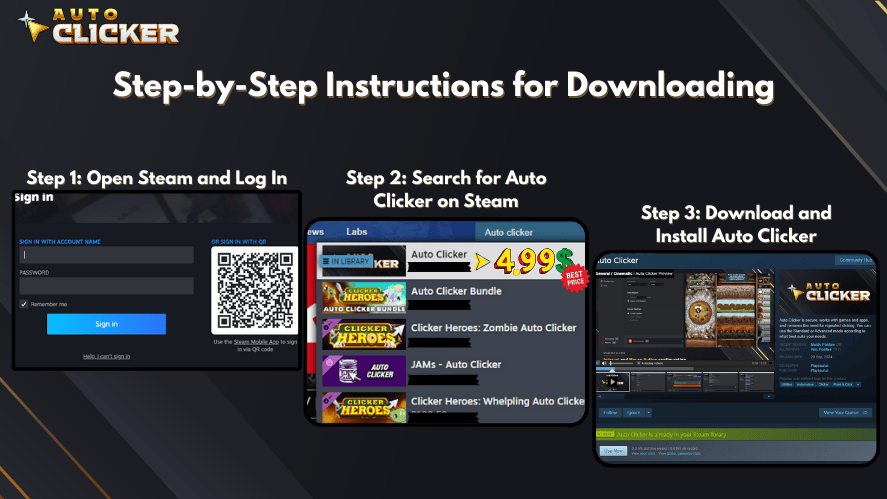
Before setting up profiles, ensure you have a safe autoclicker installed. Auto Clicker on Steam is a reliable option for both gaming and productivity tasks.
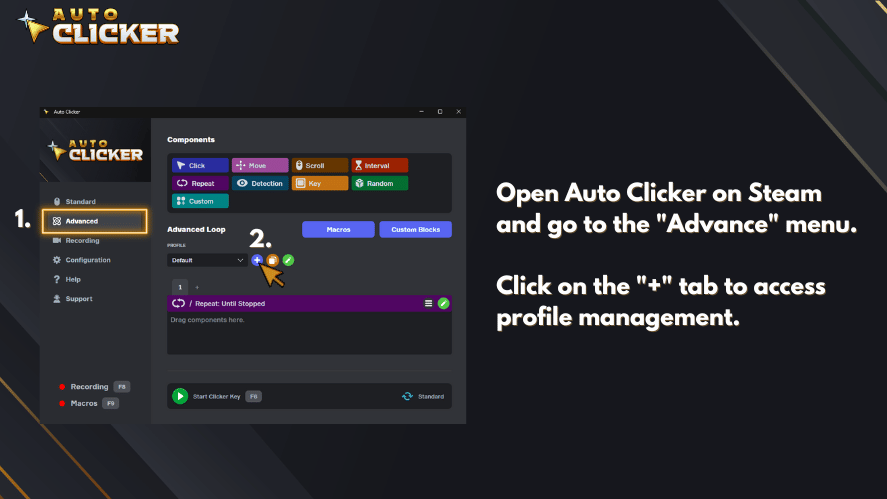
Step 2: Create a New Profile in Auto Clicker on Steam
- Open Auto Clicker on Steam and go to the “Advance” menu.
- Click on the “+” tab to access profile management.
- Give your profile a descriptive name, such as “FPS Rapid Click” or “Form Filler.”
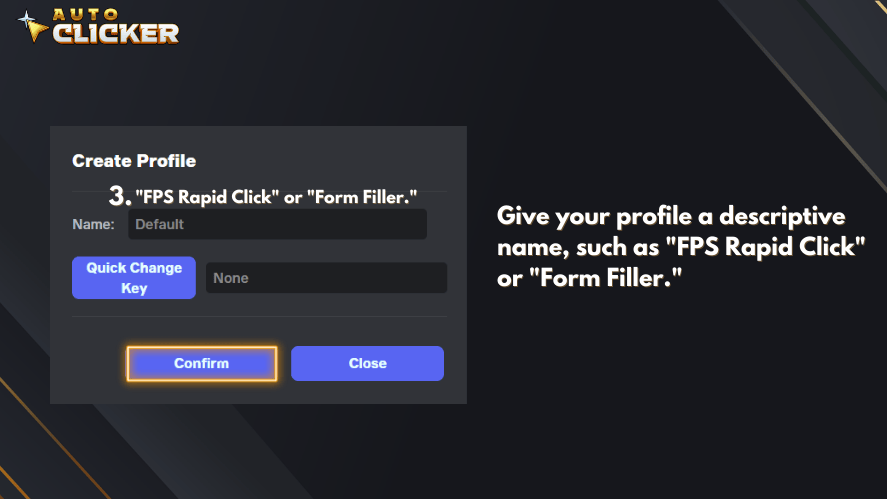
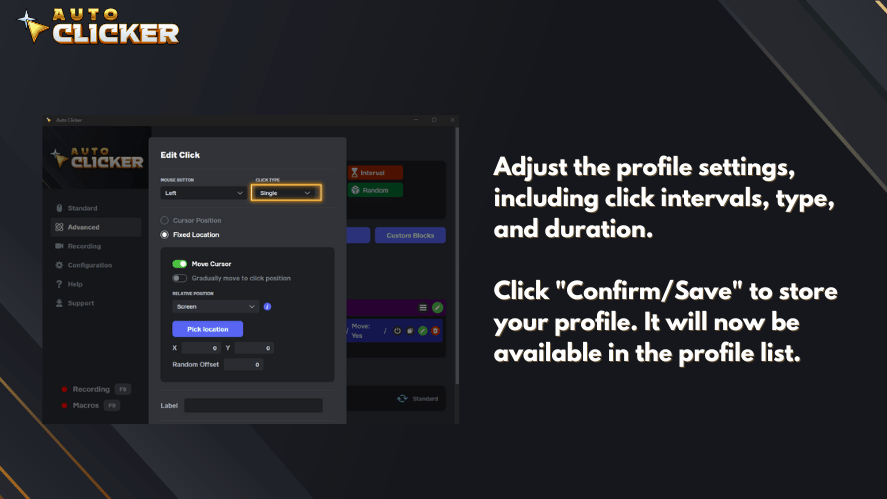
- Adjust the profile settings, including click intervals, type, and duration.
- Click “Confirm/Save” to store your profile. It will now be available in the profile list.
Once you have saved multiple profiles, you can quickly switch between them from the Profiles tab.
Step 3: Customize Click Settings
After creating a profile, fine-tune the settings based on your needs:
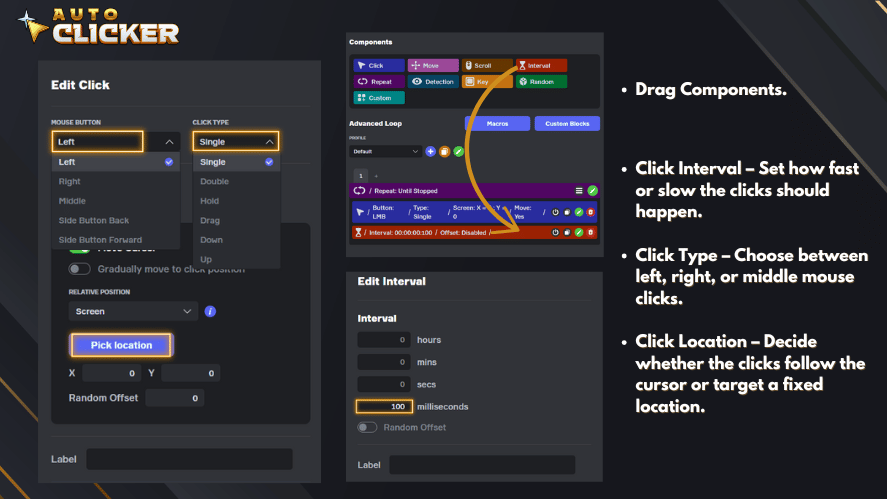
- Click Interval – Set how fast or slow the clicks should happen.
- Click Type – Choose between left, right, or middle mouse clicks.
- Click Location – Decide whether the clicks follow the cursor or target a fixed location.
For keyboard-based automation, configure an automatic key clicker to trigger specific key presses.
Step 4: Assign Hotkeys for Quick Switching
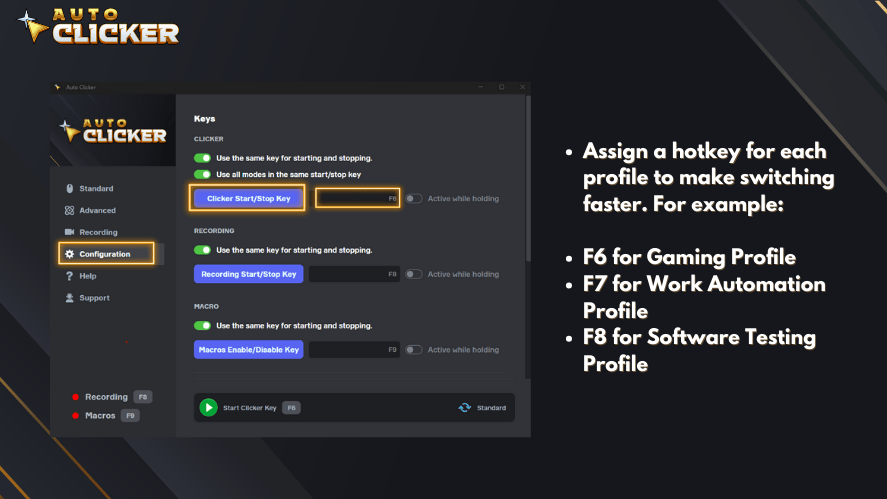
Assign a hotkey for each profile to make switching faster. For example:
- F6 for Gaming Profile
- F7 for Work Automation Profile
- F8 for Software Testing Profile
This allows users to switch between profiles instantly without opening the settings menu.
Step 5: Test and Adjust the Profile
After setting up your profile, test it in the relevant application. If needed, adjust the click speed, duration, or key bindings for better performance.
Best Practices for Managing Auto Clicker Profiles
To get the most out of your auto clicker profiles, follow these best practices:
1. Use Clear and Descriptive Names
Naming your profiles clearly helps you switch between them faster. Examples include:
- “Idle Game Auto Click”
- “Form Filling Automation”
- “Rapid Fire FPS Mode”
2. Adjust Settings for Different Use Cases
Fine-tune the following settings based on your needs:
- Speed – Use faster settings for gaming, slower for productivity.
- Duration – Short bursts for quick actions, longer durations for automation.
- Click Location – Fixed location for repetitive tasks, cursor-following for flexible clicking.
3. Backup and Restore Profiles
To avoid losing your settings, back up your profiles regularly. Many auto clicker tools allow users to export and import profile configurations.
Conclusion
Setting up auto clicker profiles makes automation easier and more efficient. Whether you’re using an auto clicker for Mac or PC, creating profiles helps automate tasks without constantly adjusting settings.
By following the steps in this guide, you can configure multiple profiles for gaming, work automation, and software testing. With proper organization and best practices, managing auto clicker profiles becomes simple and effective.
Ready to improve your workflow? Try Auto Clicker on Steam today and create your first custom profile!

Clicker Speed Test: How Fast Can You Click?
Schedule Mouse Clicks with Auto Clicker on Steam